最近在幫自己的網站從 Vultr 搬到自己家裡的主機,因為家裡的主機是拿老桌機當 Server 用,怕隨時硬碟會炸掉XD,於是就有了這個備份需求,直接丟到學校提供的Google Drive 教育板,就不用太擔心了。
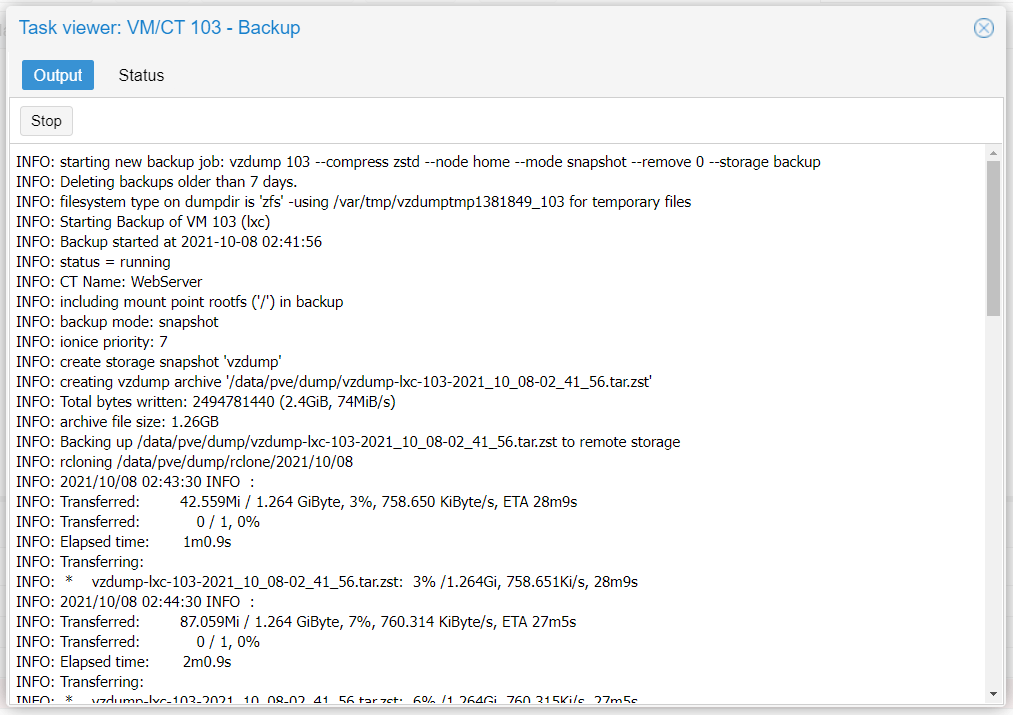
目前這個需求已經有人開發了工具,可以直接結合 Proxmox VE 內部的備份工具,可以在 Backup Log 中看到 Rclone 的相關 Log,搭配 Proxmoe VE 內建 CRON 自動備份到各種網路空間,非常方便:
安裝 Rclone
在 Proxmox VE 中以 root 身份登入,直接使用指令安裝 rclone
# apt update
# apt install rclone -y
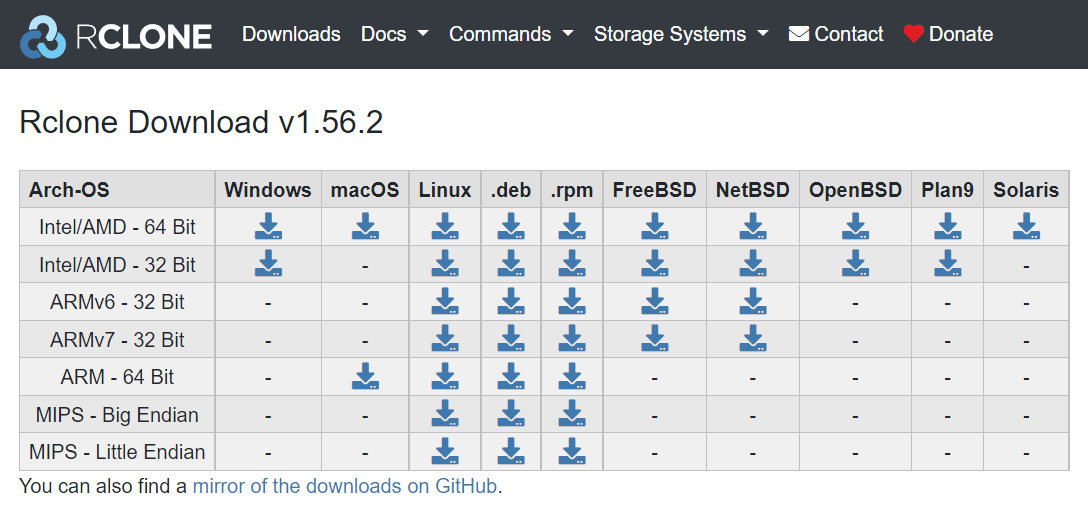
亦或到 Rclone 的官網下載安裝:
初始化 Rclone
請務必仔細跟著設定,或是你自己去研究 rclone 的 config
# rclone config
2021/10/08 02:03:49 NOTICE: Config file "/root/.config/rclone/rclone.conf" not found - using defaults
No remotes found - make a new one
n) New remote
s) Set configuration password
q) Quit config
n/s/q> n
name> gd-backup_crypt # 務必使用這個名字,或是之後改腳本
Type of storage to configure.
Enter a string value. Press Enter for the default ("").
Choose a number from below, or type in your own value
~~
15 / Google Drive
\ "drive"
~~
Storage> 15
Google Application Client Id
Setting your own is recommended.
See https://rclone.org/drive/#making-your-own-client-id for how to create your own.
If you leave this blank, it will use an internal key which is low performance.
Enter a string value. Press Enter for the default ("").
client_id> 123456789-xxxxxxxxxxxxxx.apps.googleusercontent.com
OAuth Client Secret
Leave blank normally.
Enter a string value. Press Enter for the default ("").
client_secret> xxxxxxxxxxxxxxxxxxxxxxxxxxxxxx
Scope that rclone should use when requesting access from drive.
Enter a string value. Press Enter for the default ("").
Choose a number from below, or type in your own value
1 / Full access all files, excluding Application Data Folder.
\ "drive"
~~
scope> 1
ID of the root folder
Leave blank normally.

Fill in to access "Computers" folders (see docs), or for rclone to use
a non root folder as its starting point.

Enter a string value. Press Enter for the default ("").
root_folder_id> xxxx_123456789
# 在 Google Drive 建一個資料夾,網址最後一串就是 root_folder_id
# https://drive.google.com/drive/u/1/folders/xxxx_123456789
Service Account Credentials JSON file path
Leave blank normally.
Needed only if you want use SA instead of interactive login.

Leading `~` will be expanded in the file name as will environment variables such as `${RCLONE_CONFIG_DIR}`.

Enter a string value. Press Enter for the default ("").
service_account_file> [Enter]
Edit advanced config?
y) Yes
n) No (default)
y/n> [Enter]
Use auto config?
* Say Y if not sure
* Say N if you are working on a remote or headless machine

y) Yes (default)
n) No
y/n> n
Verification code

Go to this URL, authenticate then paste the code here.

https://accounts.google.com/o/oauth2/auth?xxxxxxxxxx
# 複製上面網址到瀏覽器登入帳號,取得驗證碼填入下方
Enter a string value. Press Enter for the default ("").
config_verification_code> 123454321
2021/10/08 02:16:42 NOTICE: Make sure your Redirect URL is set to "urn:ietf:wg:oauth:2.0:oob" in your custom config.
Configure this as a Shared Drive (Team Drive)?

y) Yes
n) No (default)
y/n> [Enter]
--------------------
[gd-backup_crypt]
type = drive
client_id = 123456789-xxxxxxxxxxxxxx.apps.googleusercontent.com
client_secret = xxxxxxxxxxxxxxxxxxxxxxxxxxxxxx
scope = drive
root_folder_id = xxxx_123456789
token = {"access_token":"123454321","token_type":"Bearer","refresh_token":"123454321","expiry":"2021-10-08T03:16:42.034218011+08:00"}
team_drive =
--------------------
y) Yes this is OK (default)
e) Edit this remote
d) Delete this remote
y/e/d>
Current remotes:

Name Type
==== ====
gd-backup_crypt drive

e) Edit existing remote
n) New remote
d) Delete remote
r) Rename remote
c) Copy remote
s) Set configuration password
q) Quit config
e/n/d/r/c/s/q> q
安裝 proxmox-vzbackup-rclone
下載
以 root 身分執行,這是我修改過的版本:
# apt-get install git
# cd /root
# git clone https://github.com/fuyuanli/proxmox-vzbackup-rclone.git
# git checkout pve7
# chmod +x /root/proxmox-vzbackup-rclone/vzbackup-rclone.sh
修改 vzbackup-rclone.sh
修改第 5 行至你的備份儲存路徑
1 #!/bin/bash
 2 # ./vzbackup-rclone.sh rehydrate YYYY/MM/DD file_name_encrypted.bin
 3
 4 ############ /START CONFIG
 5 dumpdir="/data/pve/dump" # Set this to where your vzdump files are stored
備份保留的份數會依據你在 Proxmox VE 的 Backup 選項那邊來刪除,這個腳本只負責上傳檔案到雲端空間

Proxmox VE 7 修正
參考 Issue#7 中提到的方法修正,否則會上傳失敗,我 Fork 後修改的版本已經修正了:
修改第 18 行 tarfile=${TARFILE} 改成 tarfile=${TARGET}
15 if [ ! -z "${3}" ];then
16     CMDARCHIVE=$(echo "/${3}" | sed -e 's/\(.bin\)*$//g')
17 fi
18 tarfile=${TARGET}
19 exten=${tarfile#*.}
20 filename=${tarfile%.*.*}
設定 vzdump.conf
編輯 /etc/vzdump.conf 第 14 行後加入
script:/root/proxmox-vzbackup-rclone/vzbackup-rclone.sh
後存檔
1  # vzdump default settings
 2
 3  #tmpdir: DIR
 4  #dumpdir: DIR
 5  #storage: STORAGE_ID
 6  #mode: snapshot|suspend|stop
 7  #bwlimit: KBPS
 8  #ionice: PRI
 9  #lockwait: MINUTES
10  #stopwait: MINUTES
11  #stdexcludes: BOOLEAN
12  #mailto: ADDRESSLIST
13  #prune-backups: keep-INTERVAL=N[,...]
14  #script: FILENAME
15  script:/root/proxmox-vzbackup-rclone/vzbackup-rclone.sh
16  #exclude-path: PATHLIST
17  #pigz: N
設定完畢後就可以在 Proxmox VE 的界面備份了,每次備份都會觸發 vzbackup-rclone.sh ,再透過 rclone 上傳,執行 log 如下:
INFO: starting new backup job: vzdump 110 --storage local --node home --compress zstd --remove 0 --mode snapshot
INFO: Deleting backups older than 3 days.
INFO: filesystem type on dumpdir is 'zfs' -using /var/tmp/vzdumptmp2067793_110 for temporary files
INFO: Starting Backup of VM 110 (lxc)
INFO: Backup started at 2021-10-08 18:42:05
INFO: status = running
INFO: CT Name: pykms
INFO: including mount point rootfs ('/') in backup
INFO: backup mode: snapshot
INFO: ionice priority: 7
INFO: create storage snapshot 'vzdump'
INFO: creating vzdump archive '/var/lib/vz/dump/vzdump-lxc-110-2021_10_08-18_42_05.tar.zst'
INFO: Total bytes written: 962498560 (918MiB, 65MiB/s)
INFO: archive file size: 274MB
INFO: Backing up /var/lib/vz/dump/vzdump-lxc-110-2021_10_08-18_42_05.tar.zst to remote storage
INFO: rcloning /var/lib/vz/dump/rclone/2021/10
INFO: 2021/10/08 18:43:21 INFO  :
INFO: Transferred:   	   44.496Mi / 274.777 MiByte, 16%, 763.432 KiByte/s, ETA 5m8s
INFO: Transferred:            0 / 1, 0%
INFO: Elapsed time:       1m1.3s
INFO: Transferring:
INFO:  *    vzdump-lxc-110-2021_10_08-18_42_05.tar.zst: 16% /274.777Mi, 763.432Ki/s, 5m8s
INFO: 2021/10/08 18:44:21 INFO  :
INFO: Transferred:   	   88.684Mi / 274.777 MiByte, 32%, 750.874 KiByte/s, ETA 4m13s
INFO: Transferred:            0 / 1, 0%
INFO: Elapsed time:       2m1.3s
INFO: Transferring:
INFO:  *    vzdump-lxc-110-2021_10_08-18_42_05.tar.zst: 32% /274.777Mi, 750.874Ki/s, 4m13s
INFO: 2021/10/08 18:45:21 INFO  :
INFO: Transferred:   	  132.840Mi / 274.777 MiByte, 48%, 769.235 KiByte/s, ETA 3m8s
INFO: Transferred:            0 / 1, 0%
INFO: Elapsed time:       3m1.3s
INFO: Transferring:
INFO:  *    vzdump-lxc-110-2021_10_08-18_42_05.tar.zst: 48% /274.777Mi, 769.235Ki/s, 3m8s
INFO: 2021/10/08 18:46:21 INFO  :
INFO: Transferred:   	  177.402Mi / 274.777 MiByte, 65%, 768.902 KiByte/s, ETA 2m9s
INFO: Transferred:            0 / 1, 0%
INFO: Elapsed time:       4m1.3s
INFO: Transferring:
INFO:  *    vzdump-lxc-110-2021_10_08-18_42_05.tar.zst: 64% /274.777Mi, 768.902Ki/s, 2m9s
INFO: 2021/10/08 18:47:21 INFO  :
INFO: Transferred:   	  218.777Mi / 274.777 MiByte, 80%, 645.420 KiByte/s, ETA 1m28s
INFO: Transferred:            0 / 1, 0%
INFO: Elapsed time:       5m1.3s
INFO: Transferring:
INFO:  *    vzdump-lxc-110-2021_10_08-18_42_05.tar.zst: 79% /274.777Mi, 645.420Ki/s, 1m28s
INFO: 2021/10/08 18:48:21 INFO  :
INFO: Transferred:   	  262.652Mi / 274.777 MiByte, 96%, 742.687 KiByte/s, ETA 16s
INFO: Transferred:            0 / 1, 0%
INFO: Elapsed time:       6m1.3s
INFO: Transferring:
INFO:  *    vzdump-lxc-110-2021_10_08-18_42_05.tar.zst: 95% /274.777Mi, 742.687Ki/s, 16s
INFO: 2021/10/08 18:48:40 INFO  : vzdump-lxc-110-2021_10_08-18_42_05.tar.zst: Copied (new)
INFO: 2021/10/08 18:48:40 INFO  :
INFO: Transferred:   	  274.777Mi / 274.777 MiByte, 100%, 668.665 KiByte/s, ETA 0s
INFO: Transferred:            1 / 1, 100%
INFO: Elapsed time:      6m20.2s
INFO: cleanup temporary 'vzdump' snapshot
INFO: Finished Backup of VM 110 (00:06:35)
INFO: Backup finished at 2021-10-08 18:48:40
INFO: Backing up main PVE configs
INFO: Tar files
INFO: rcloning /var/tmp/proxmox-cC0xj8WC/pveConfig.2021-10-08.18.48.40.tgz
INFO: 2021/10/08 18:48:43 INFO  : pveConfig.2021-10-08.18.48.40.tgz: Copied (new)
INFO: 2021/10/08 18:48:43 INFO  : pveConfig.2021-10-08.18.48.40.tgz: Deleted
INFO: 2021/10/08 18:48:43 INFO  :
INFO: Transferred:   	   34.916Ki / 34.916 KiByte, 100%, 34.910 KiByte/s, ETA 0s
INFO: Checks:                 2 / 2, 100%
INFO: Deleted:                1 (files), 0 (dirs)
INFO: Renamed:                1
INFO: Transferred:            1 / 1, 100%
INFO: Elapsed time:         3.0s
INFO: Cleaning up
INFO: Backup job finished successfully
TASK OK
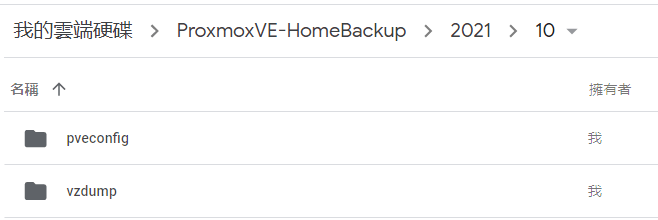
跑完的檔案會在這兩個位置
GoogleDrive/Year/Month/vzdump:VM/LXC 備份
GoogleDrive/Year/Month/pveconfig:/etc/pve/ 備份
檔案還原
使用指令
~/proxmox-vzbackup-rclone/vzbackup-rclone.sh rehydrate
會把上面的備份都下載下來,建議未來有需要時再手動下載就好,我覺得沒有很好用